

Gardening Answers
Do you have a gardening question that is not listed here? Send an email to food.hero@oregonstate.edu. Or, Master Gardeners can help!
If you are in Oregon visit this Ask Master Gardeners page.
If you are outside of Oregon, contact your local Extension office, or you can submit your question online.
What is bolting?

What is bolting?
Bolting happens when a plant reaches the end of its growth cycle. It changes from making leaves and roots to making flowers and seeds for the next season of plants. That is why bolting is often called "running to seed" or "going to seed."
Bolting is normal, but can be a problem for gardeners when it happens before they get a full harvest of vegetables. When the plant is stressed, often by heat or amount of sunlight, it is more likely to bolt. While the plant is rushing to make seeds, it is also making tough and bitter leaves as a way to protect itself until the seeds are ready.
Plants that are more likely to bolt are lettuce, other leafy greens, basil and cilantro. To slow down bolting and enjoy more tasty leaves, the gardener can do a few things:
- Plant cool-weather plants in the spring (or early fall for some) when days are cooler and shorter.
- Protect plants from too much sun and heat with shade cloth or by planting in shady areas or near larger plants that provide shade. If you are growing in containers, move plants to a shady area if you can. Light-colored and large containers will help keep roots from overheating.
- Look for slow-to-bolt varieties when buying seeds or plants.
- Put a layer of mulch around plants to cool the soil.
- Trim back growing leaf stalks or flower buds as soon as you see them.
What are some bee friendly plants I can add to my garden?
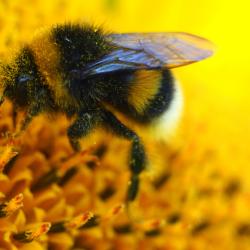
What are some bee friendly plants I can add to my garden?
Plant flowers and flowering trees. If possible, choose types that produce lots of pollen and nectar.
Here are some easier-to-grow plants that bees love:
- Flowering plants: clover, sunflowers, phacelia, purple aster, oregano, thyme, cilantro, mint, and California lilac
- Flowering trees: big leaf maple trees, apple, cherry and willow trees
Besides planting bee-friendly plants, read about three other things you can do for bees here:
https://foodhero.org/sites/foodhero-prod/files/health-tools/xWhat%20You%20Can%20Do%20for%20Bees.pdf.
Is there a “challenging” plant I can try to grow?
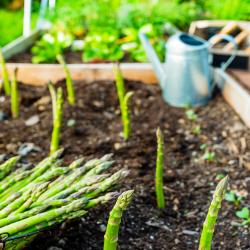
Is there a “challenging” plant I can try to grow?
It is great to try and grow a “challenging plant,” as that is one of the best ways to learn about gardening. Even if the plant doesn't thrive or produce a harvest, you'll learn a lot and become a better gardener!
Different plants can be challenging for different people. For instance, the challenge for some people might be not having a lot of space in which to grow a spreading plant like pumpkins. The challenge for others might be living in a place that has colder nights throughout the summer--tomatoes, for example, don't like cold nights!
Here are two plant characteristics that many people might find challenging.
1. A long germination time. (Germination time is how long it takes a seed to sprout and begin to grow.) Asparagus, lavender and rosemary take more than two weeks to germinate.
- Click on the link here to learn more about how to grow asparagus: https://foodhero.org/seeds/asparagus.
- Find tips on starting any seeds here: https://foodhero.org/healthy-food/what-are-some-things-i-should-know-about-planting-seeds.
2. Plants that "bolt", or bolt quicker than other plants. Bolting is something most plants do as a result of hot weather; it is when a plant goes from providing something to harvest to instead producing flowers and seeds. Leafy greens and cilantro are two examples for which you can try and a shade cloth over them in the summer to lower the sun and heat they receive. Or grow them in a container and move then into a shaded, cooler areas in the summer, or heat of the day.
Other plants the Food Hero Garden team has heard can be challenging from Grow This! participants include artichokes, carrots, celery, and onions.
What is a great plant to grow with kids?

What is a great plant to grow with kids?
Lettuce is a great option:
- Many different types with different colors and flavors
- Can grow in cool, shaded areas with low light (great for classrooms)
- Can grow in containers that don’t have to be deep (4 to 6 inches works well)
- Grows more quickly than many other plants
- Does not need a lot of attention while growing
What are some ways that roots help plants?
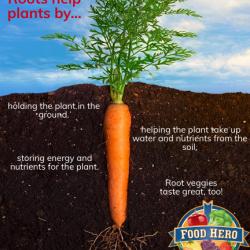
What are some ways that roots help plants?
Roots help plants by:
- holding the plants into the ground.
- helping the plant take up water and nutrients from the soil.
- storing energy and nutrients for the plant.
Root vegetables taste great too!
Am I watering my seeds the right amount?
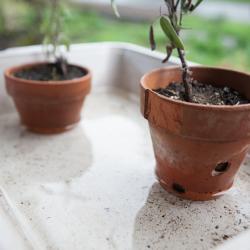
Am I watering my seeds the right amount?
Try using a spray bottle, just a few sprays to get the soil moist and you are good to go! When your plant is much bigger try watering it from below!! Fill a bowl or deep dish up with water and place your tray or pot in the water. Depending on the size of the plant and pot you till need to leave your plant in the water until is absorbs water to the roots.
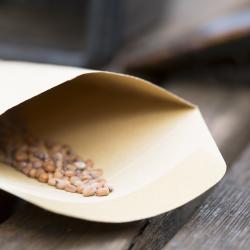
Should I use my full seed packet at one time?
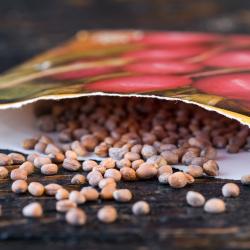
Should I use my full seed packet at one time?
A full packet of seeds might be too much for planting at one time in a home garden.
Seed packets vary in the number of seeds they contain. A packet of watermelon seeds might contain only 4 to 6 seeds, whereas a packet of carrot seeds might have 200.
There are many different ways to extend the whole packet and make it useful in one or two seasons.
- If you have a type of seed that ages well, such as leafy greens, or is currently not past its expiration date you can store it for the next year.
- Space out the packet and use it throughout the year through succession planting. Succession planting is spreading out (staggering) the start date of your plants. For example, starting in spring, plant carrot seeds every two weeks. That way, once your first crop matures, you’ll have new carrots ready to harvest every two weeks.
- Another option is to harvest your first batch of carrots, then right away plant the next batch in that spot.
- Once you’ve planted all you want in your garden bed, take the left over seeds and try growing microgreens indoors. It’s a great way to keep a little fresh produce growing year round. Learn how to grow microgreens at this link: https://foodhero.org/microgreens-garden-tips-and-how-grow.
Why are my seeds pink, blue, or purple?
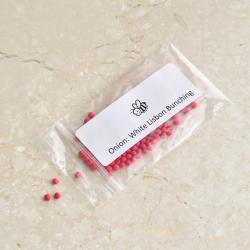
Why are my seeds pink, blue, or purple?
It can be surprising, exciting, or maybe even worrisome to open a seed packet and find brightly colored seeds.
Some seed companies apply a colorful shell around their seeds to help them germinate (begin to grow) and to help you see them when planting. In fact, these are called "easy to sow" seeds. The colorful coating on the Grow This! Challenge seeds is an all-natural mix of clay, perlite, and FDA-approved food coloring. It makes direct sowing/seeding into an outside garden (versus seeding inside first) easier, and helps you see where they seeds are going when you are spacing them in the soil to plant. However, the coating does add a few days to the germination time as compared to uncoated seeds.
Can flowers help me grow food?
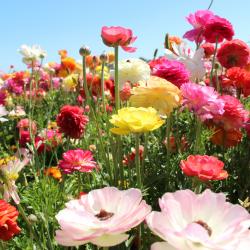
Can flowers help me grow food?
Some people see flowers only as beautiful plants that may smell nice. But flowers can increase the health of your garden, and help you grow more food.
Different flowers attract different types of pollinators such as bees and butterflies, which help food crops to grow.
Some plants, like eggplants, tomatoes, and all fruiting trees and bushes, need or will greatly benefit from pollinators or else they will produce very few or no fruits or vegetables. Tomatoes can self pollinate by pollen being blown from one flower to another, but it produces a low yield or harvest.
So please, when you plan your fruit and vegetable garden, consider planting some flowers, too. The happier your pollinators are, the happier your plants and soil will be.
How do I store my extra plant seeds?
How do I store my extra plant seeds?
Save seeds directly from plants or those you don't use from a seed packet.
Learn more about seed expiration dates here: https://foodhero.org/healthy-food/should-i-throw-out-my-seeds-their-exp….
Tips for storing seeds: (except for tomato seeds directly from plants as they are very different to save)
- Before storing your seeds, be certain the seeds are fully dry, to the point of being brittle or breakable.
- Place dried seeds in a paper envelope, which will absorb any moisture that might get in, and label it with the seed name and year. Another tip is to save silica packets that can be found in some food or packages and put them in with the seeds to help absorb moisture, but keep them away from children as the packets can be a chocking hazard.
- Label and date the envelope. If you are saving unused seeds from a seed packet label the envelope with the expiration date from the seed packet.
- Put the envelopes in an airtight container out of direct sunlight. Store the container in a cool, dry place. A refrigerator or freezer is a great storage spot.